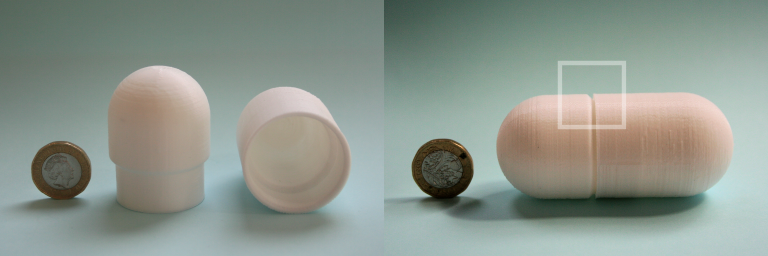
A right circular cylinder, about three times its radius in height, capped by hemispheres makes a satisfying pill shape. I bisected the pill perpendicular to its axis of circular symmetry to allow both the hemispheres to be 3D printed convex. The two halves would need to be joined.
Pill box 1
On my first attempt, I made the parts hollow and allowed a minimum shell width of about 2 mm. The pill was now a pill-shaped box.
I modelled the halves to overlap by about a radius in height. I allowed a 0.25 mm gap, as I thought that would allow a transition fit. So, outside of the region of overlap, the shell width was about 4.25 mm. 45° transitions between one shell width and another would allow printing without support (with the exception of the underside of the hemispherical cap). Cura’s tree supports were used to support the underside of the cap.
I printed with a layer height of 0.2 mm. With one exception, the printed model worked; the two halves married with light pressure and friction kept them together.

The exception was the relative height of the two overlaps was not calculated correctly. This resulted in a slight notch (highlighted in the image above).
Printing was not without other problems. At first, PLA would not extrude from the nozzle. I removed the filament, used the tool provided to unblock the nozzle and reinserted the filament. On the second attempt, everything was back to normal.
Pill box 2
A better pill box would screw open and closed. My second attempt fixed the notch of the first and also added a screw to the overlap region.
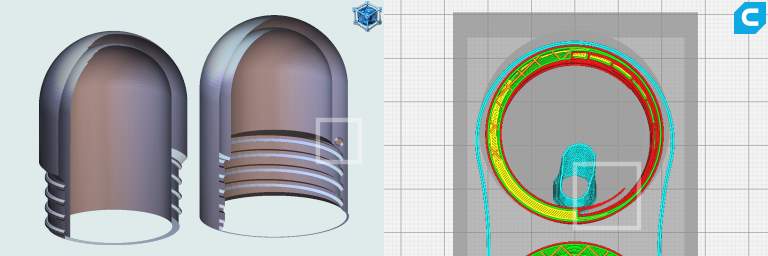
A raised screw thread was created using the helix tool of Hexagon 2.5.2.137 (beta) and an octagonal cross-section with a radius 0.8 mm. The octagon was rotated so that two of its edges were horizontal. The recess for the thread was similarly created but allowing for a gap of 0.3 mm. With one exception, this approach to the modelling worked.

The exception was that the thread recess continued on too high and cut into the full thickness of the shell. This resulted in unsupported areas after slicing (highlighted in the image above).
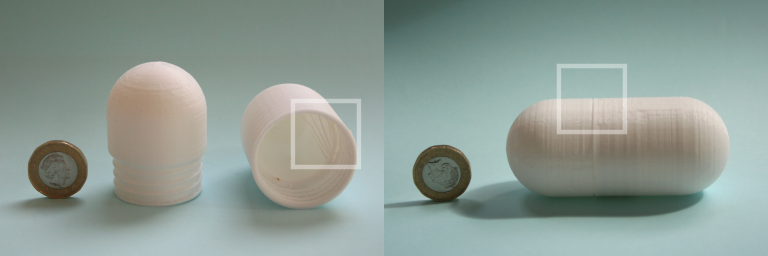
However, despite that defect in the modelling, the printed model worked. As before, I used a layer height of 0.2 mm. There was, however, significant stringing at the point of the defect (highlighted in the image below).

On reflection, an octagonal cross-section was not the most appropriate choice. It resulted in horizontal overhangs, albeit small ones.